Showing posts with label DIY. Show all posts

Sunday, June 17, 2012

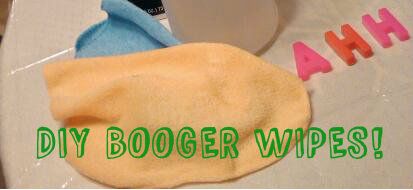
DIY Booger Wipes...yes, really!


Grrr!  Colds!  Here, my darling son is showing frustration for his ailment.


If you're not yet a mom or grandma, save or pin this info somewhere.  It may come in handy.  My friend Amanda introduced me to the booger wipes you buy at the store.  They do a great job of breaking up the crusty noses that plague your little ones during a cold.  They're also a bit medicinal, for what bit of saline gets into the nose.  They're wonderful, and I love that they were invented by creative moms. I buy them to keep in the diaper bag.

The price tag is a bit of a budget buster, though.  At a local discount store, a package of 30 costs $4.38...!!!  I gave a lot of thought to how I might be able to create similar results at home.  So, I adapted this recipe for saline nose drops to create a formula for wipes anyone could make.  Disclaimer:  this is not quite as simple as pulling out a pack of wipes, which is why I recommend them for home use.


2 cups of warm water
1 teaspoon of salt
1 tablespoon of baby oil

Mix the warm water and salt together until the salt dissolves.  Add in the baby oil and shake to mix.  You will need to shake/stir the mixture before each use as well.  Store mixture in the refrigerator.  And now to answer a few questions you may have...

Why do I need to store it in the refrigerator?  Saline sprays and wipes normally have preservatives to prevent mold and bacteria.  We're avoiding the use of those preservatives.  You may want to warm the wipe for a few seconds in the microwave before using it on your kiddo's face.  As wattage varies, please check the temperature of the warmed wipe before use.

What material should I use for the wipe?  You can use a baby washcloth, or a soft cloth cut to washcloth size.  I love flannel for this purpose.  Using old t-shirts would be a great way to upcycle.

What's the best way to wet the wipes?  This is a matter of preference, and mine is to put the mixture in a spray bottle, which is stored in the refrigerator.  I spray the wipe, hold it in my hand for a few seconds to warm it, and use.  Secondly, you can put the refrigerated mixture in a container like an old baby wipe tub.  But, this will require you to put your hand in that chilly water and wring out the wipe.  Lastly, you could wet and wring out the wipes and store the wet wipes in a tub in the fridge.  You may find this to be the most convenient.
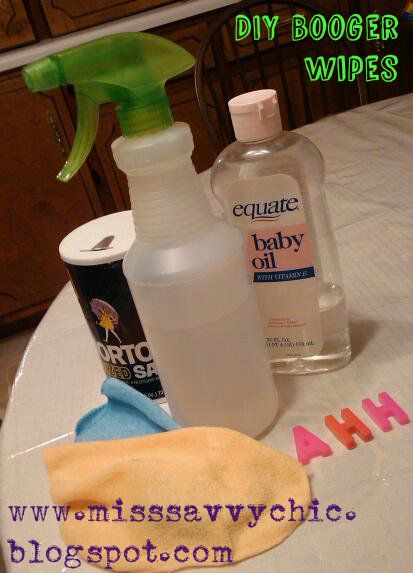
These wipes are working well for my little ones.  They've had plenty of crust on their noses lately.  I am hopeful I'll soon be able to put this recipe away for a while.  Special thanks to my mom for her help with the photos.  Blessings!

Monday, March 5, 2012

A Tale of Two Shirts

I don't know about you, but around here we go through a lot of garments.  And when I say "go through," I mean mysterious stains appear out of nowhere that cripple garments right out of commission.Yes, I remove what stains I can, but there are only so many hours in a day.

So, these two blue guys were waiting to fulfill their rag destinies.  I also had a couple of dollar bin frames.  So, I decided to upcycle them into his and hers dry erase boards.
"His" was very simple.  I just cut the pocket from one shirt and centered it on a swatch from the other shirt, giving it a two-tone effect. 
Special thanks to my friend Gina Frank for showing me how to make fabric rosettes.  If you've never made them, here's a tutorial.  Gina and I rolled the edges in.  But, if you like the frayed look, leave them out.  I hot glued them on, and then I put fabric under the glass.  You could also use scrapbook paper.

Above:  Already using it!

Below:  Photography expirament.

Blessings!

Thursday, November 17, 2011

A Third Life

So far, my living room tables have had three lives: once with their first owner, another with me for the past two years, and its current life after a much needed makeover.  They are sassier now; you can just tell.

Sometimes, you have to have the willpower of a steam engine to get anything done.  My table makeovers may have not required a penchant for creativity, but I made up for it with stubborn determination.  What do you do with a three-year-old and a not-quite-one-year-old when you've gotta get the job done?  You let the big one ride his bike and big wheel in front of the house, and alternate the baby between the pack 'n' play and the walker.  They were actually great companions.
You can see from the background of my picture that while prepping for paint, "someone" came to do yard work (and also blow bits of grass and leaves everywhere).  Gotta laugh.

I kept the bottoms a slightly metallic gray.  They were showing some wear.  Rather than try to make them look new (I love the color), I decided to later distress the tops.  Let's be honest; in my house they're going to end up in distress anyway.  Center glass was removed.    And that brings up my only misgivings about painting these pieces...  How would they look with light wood when the glass is a smoked color?  But, I press on anyway.
After one coat of primer and three coats of ivory spray paint ($12 total, thank you, Hobby Lobby clearance), I brought them in for a bit of sanding to age a bit.  And, WOW, these tables were MEANT to be light all along.  Thanks to my friend Laura Goins (http://www.lauragoins.blogspot.com/), for giving me encouragement that it would, in fact, look good in the end.  I love them.

And, speaking of having the willpower of a steam engine, I'd like to say thanks to my hubby.  He, while pressure washing outside the house, didn't let a little broken chain get in the way of finishing the job. Nice work!